No products in the cart.
On this page you will find an overview and explanation of the different Door Pull Handle Mounting options.
Watch the Video below to see a detailed explanation of the different types of mounting options.
Watch the Video below to see a detailed explanation of the different types of mounting options.
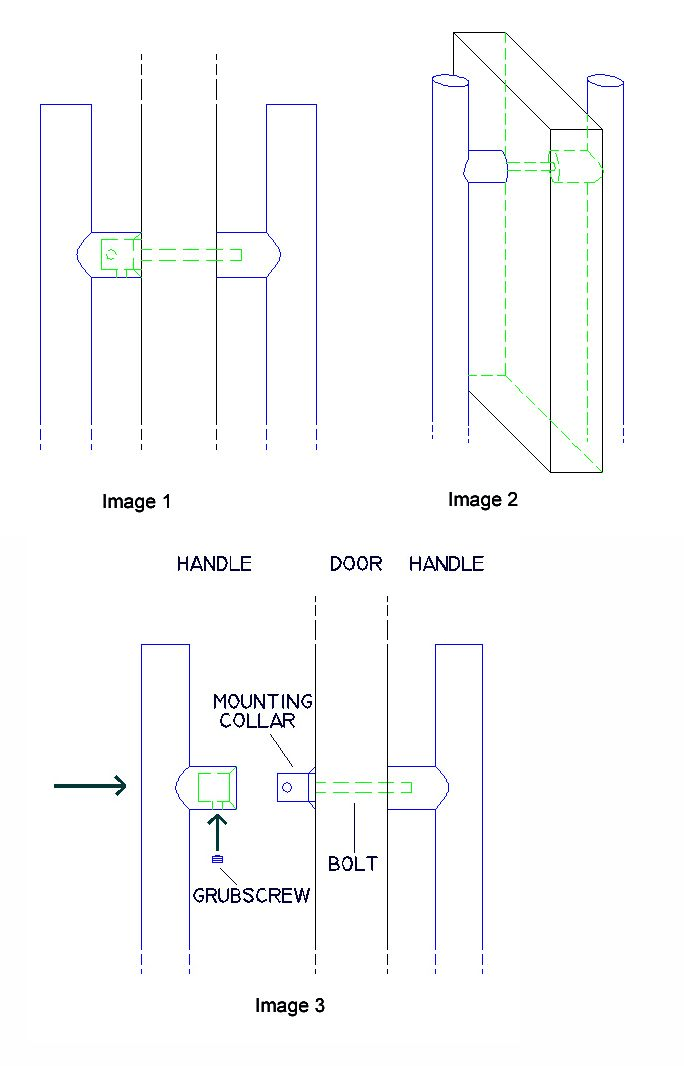
This is used on doors where you want the same handle on both sides of the door. This system is often called Universal Mount and is suitable for most types of doors.
The diagrams below, demonstrate how this works. Images 1 & 2 show the final result. Image 3 shows a hole is drilled through the door, the mounting collar is placed over the hole and a bolt is inserted through the mounting collar and the hole. The bolt is then screwed into the first handle. The second handle is placed over the top of the mounting collar, the set screws are tightened with a hex key (supplied) to hold the handle securely in place as shown. These Handles are Back to Back Mount;
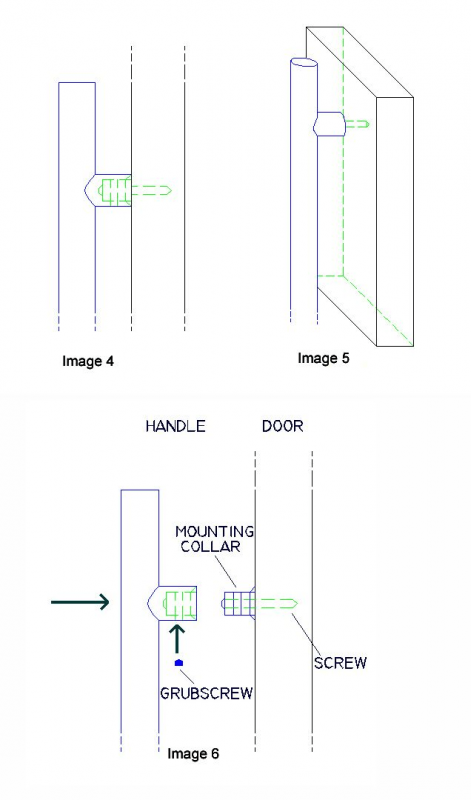
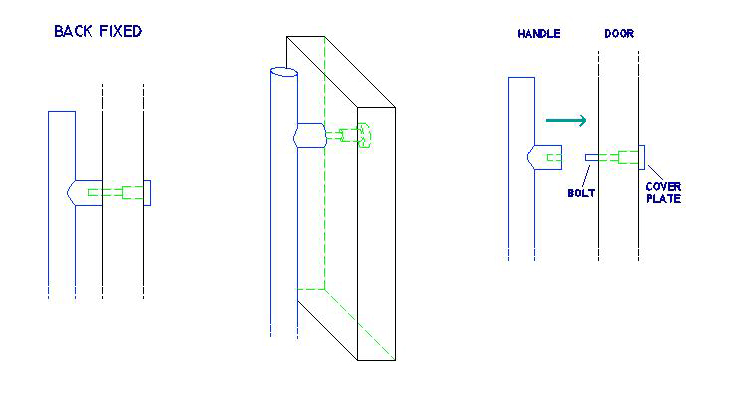
This is used on doors where you want the handle on the front of the door only. This means you can have the handle attached on one side of the door without having anything protruding on the other side. This also allows you to use different handles for each side of the door. This system is applicable for Wood Doors only. The diagrams below, demonstrate how this works. Images 4 & 5 show the final result. Image 6 shows the collar is placed on the door with a screw inserted through the collar. The screw is then driven into the door. The handle is placed over the top of the collar, the grub screws are tightened with a hex key (supplied) to hold the handle securely in place as shown.
These Handles are Front/Concealed Mount:
The following handles can also be set up for Back to Back Mount;
These Handles are also Front Mount, however, they attach slightly differently with bolts screwed through the base of the handle:
The following Handles come in left and right versions;
The others can be used as either left or right. When you order two sets of handles for double doors we always send one of each. If you order a single set of handles, you will need to tell us which one you want.
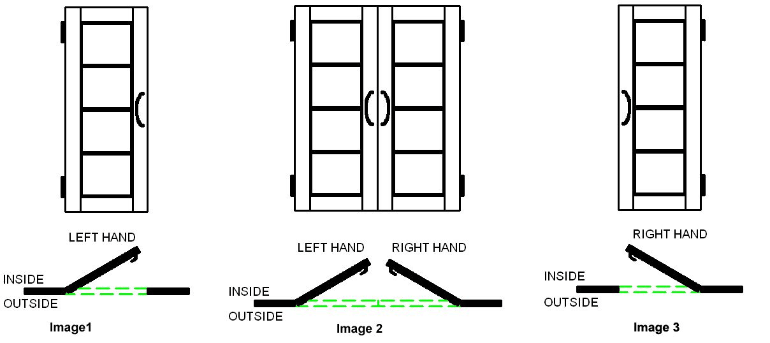
To make it easier for you to decide if you want a left or right handle the images below show what to look for. The usual way to decide is to look at the door from the outside. Look for the hinges on the door, whichever side the hinges are on, tells you what handles you need.
If the hinges are on the Left as you look from the outside of the front door then you will need a Left hand handle on the front of the door. (As shown in image 1)
Also, if the hinges are on the Right as you look from the outside of the front door then you will need a Right hand handle on the front of the door. (As shown in image 3).
If you didn’t find what you are looking for or you want something a little different then check out these links for more of our Sensational Front Door Handles: